

How To Lay Railway Sleepers In The Garden: 7 Steps To Stunning Borders And Raised Beds
What do railway sleepers and a chameleon have in common? They seamlessly blend into any garden, whether it’s modern, rustic or eclectically styled. If you’re looking to exploit the flexibility of these charming accessories, building raised beds or introducing some stylish garden edging is a great way to go. And to do that, you’ll need to know how to lay railway sleepers in the garden.
Luckily, that’s not too big of an ask. With a dash of creativity and a little DIY know-how, you can set off a stunning transformation. Let’s explore the art of laying garden sleepers, so you can get started on this next project with confidence. Here’s what we’ve got in store:
- Why Use Railway Sleepers In The Garden?
- Planning Your Project
- How To Lay Railway Sleepers In 7 Simple Steps
- Extra Tips On How To Lay Sleepers As A Border
- Extra Tips On How To Lay Sleepers For Raised Beds
- FAQs
- Conclusion
Why Use Railway Sleepers In The Garden?
There’s a reason that railway sleepers have become a staple in landscaping. For one, they’re incredibly versatile, easy to work with, and full of character. They’re also practical: heavy enough to stay in place without the need for complex fixings, strong enough to handle pressures from soil and the weather, and available in a range of sizes and finishes to suit every budget.
Here are just a few popular ways to use railway sleepers:
- Raised vegetable or flower beds
- Lawn edging
- Garden steps and retaining walls
- Terracing on sloped gardens
- Pathways
- Rustic garden seating or benches
- Frames for outdoor planters
- Dividers between garden zones
- Low level walls or borders
Whilst this guide focuses specifically on how to use railway sleepers for borders and raised beds, many of the steps – from ground prep to fixings – apply just as well as foundational knowledge for other sleeper-based projects too.
First Up, Planning Your Project
Prepare And Measure Up
To start off you will need to plan out the location and size of your railway sleeper project, so you know how many sleepers you will need to budget for.
Ensure that you have an accurate idea of how much space your material will cover and plan accordingly. If you need to, cut down your sleepers to size.
Pick Out Your Railway Sleepers
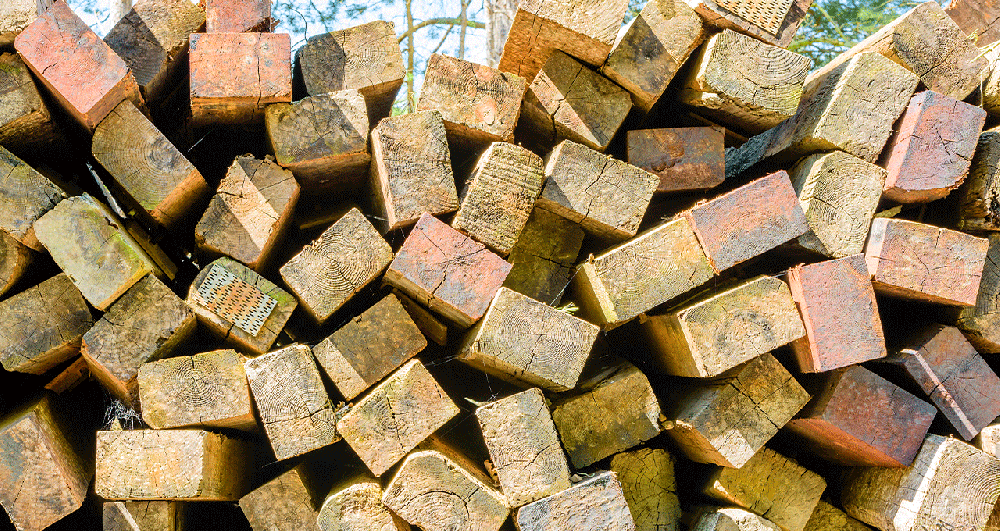
Garden sleepers come in all shapes and sizes, from new oak varieties to the reclaimed and restored railway sleepers that once laid the foundations for all the rail routes across the country. Depending on the look you’re after (and how much maintenance you’re willing to take on), there are three key options to choose from.
- Reclaimed sleepers offer a weathered, rustic aesthetic with lots of character. These are ideal if you’re going for a more traditional or countryside look, but they may require a bit more prep or treatment.
- Softwood sleepers are budget-friendly and easy to handle, making them a popular choice. They’re great for most garden projects and, with the right care, offer good longevity.
- Hardwood sleepers, like oak, are more durable and naturally resistant to rot and insect damage. They tend to be slightly heavier and harder to work with, but they are a great long-term investment for more permanent or high-traffic areas.
Quick Tip: Not sure which timber is right for your garden? Check out our guide to the best wood for outdoor use to learn more about the pros and cons of each material.
Get Your Tools Ready
Once you have your railway sleepers ready, it’s time to get your tools organised. To lay railway sleepers for garden edging or raised beds, you will need:
- Work overalls or clothes you can get mucky
- PPE (heavy-duty gardening gloves and goggles)
- A good saw, screwdriver and hammer
- Spirit level and measuring tape
- Fixings such as rods, screws or brackets
- Wood stain or preservative (optional)
When’s The Best Time To Lay Garden Sleepers?
Although laying garden sleepers isn’t an activity restricted by the time of year, most gardeners and DIYers find it convenient to get the job done in the colder seasons, as long as the soil isn’t too wet or frozen. In fact. Countryfile suggest that winter is the ideal season for digging garden beds, so if you’re pondering how and when to lay sleepers for raised beds, November to February is the optimal time.
Quick Tip: To ensure the project isn’t a washout, you can plan around the weather, aiming for a day where waterlogging won’t be a worry. Remember to mark it on the calendar and you can’t go wrong!
Laying Railway Sleepers In The Garden In 7 Simple Steps
You’ve waited for the optimal weather conditions and you’re kitted out in your gardening gear – now what? It’s time to get on with laying the garden sleepers.
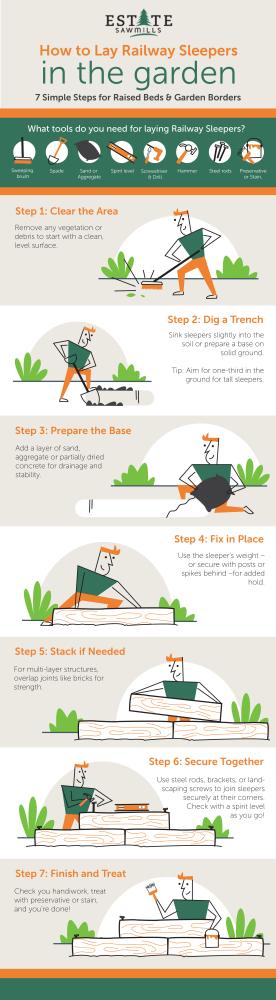
1. Make Space And Prep Your Sleeper
Whether you’re learning how to lay sleepers as a border for the garden or for raised beds, you’ll want a nice, clean canvas to work from. This means removing any debris or vegetation in the area to ensure you have a clear surface before you start laying the sleepers.
And don’t forget your sleeper canvas too - to eliminate the possibility of getting a nasty splinter from the wood, sand down the rough surface until it’s safe and smooth to touch.
2. Get Digging
If you plan on placing your railway sleeper onto a solid surface, such as a patio or concrete, they can be put directly on top, but if you’re going to place them on soil, they need to be slightly sunken into the ground. This step is especially important if you’re building a raised planter for your veggies or tall edging for your lawn.
Dig a shallow trench for the first sleeper to lie in, being extra careful with your spirit level to ensure they’re laid perfectly flat. Many landscapers like to follow the saying “one third in the ground, and two thirds out.” Hence why we suggest sinking your garden sleepers roughly 0.3m into the earth if they measure 1m tall.
3. Filling In Your Trench
Although you may want to place your garden sleepers straight onto the soil and give them the time to bed into the ground, we recommend putting in a layer of partially dried concrete, sand or aggregate first to avoid water pooling around the edges of the sleepers. This will help excess water drain away and reduce the likelihood of the wood rotting.
4. Fasten Your Sleepers Into Place
Fastening your railway sleepers into position is relatively simple. They will easily bed into your newly dug foundations with their weight, and often this is enough. If you want to go the extra mile, however, you can fix a wooden post or spike behind them, hidden from sight.
5. Stack ‘Em High
If you’re not going for height, skip this step. But if you are, there is one thing to keep in mind: When building a structure that will be more than one railway sleeper in height, ensure you overlap joints neatly at the corners as well as along the straight runs as you would with bricks. This will provide a stronger framework for your raised beds or borders, keeping them tightly in place.
Heads-Up: If you’re stacking sleepers for a retaining wall or making significant changes to ground levels, you may need planning permission – it’s always worth checking with your local authority first.
6. Join Your Garden Sleepers Together
When you’re laying railway sleepers in the garden, you may be required to use screws or other fastenings to keep the frame of your structure solid – the most popular are steel rod pins, joining brackets or long landscaping screws.
As you secure the sleepers, take care that each of them stands perfectly level according to the readings on your spirit level. This is particularly crucial for features that are more than three sleepers high. You’ll want to make sure all heavy layers have been joined to the bottom sleeper, considering the use of steel retaining posts where necessary. Be sure to place the fixings at the corners and along joints to prevent shifting over time.
7. Give The Surface Some TLC
Once that’s complete and your sleepers are secure, it’s time to think about staining. You’ll want to ensure that any exposed or cut surfaces are properly treated with a quality wood preservative. This will keep them looking gorgeous for years to come.

Extra Tips On How To Lay Sleepers As A Border
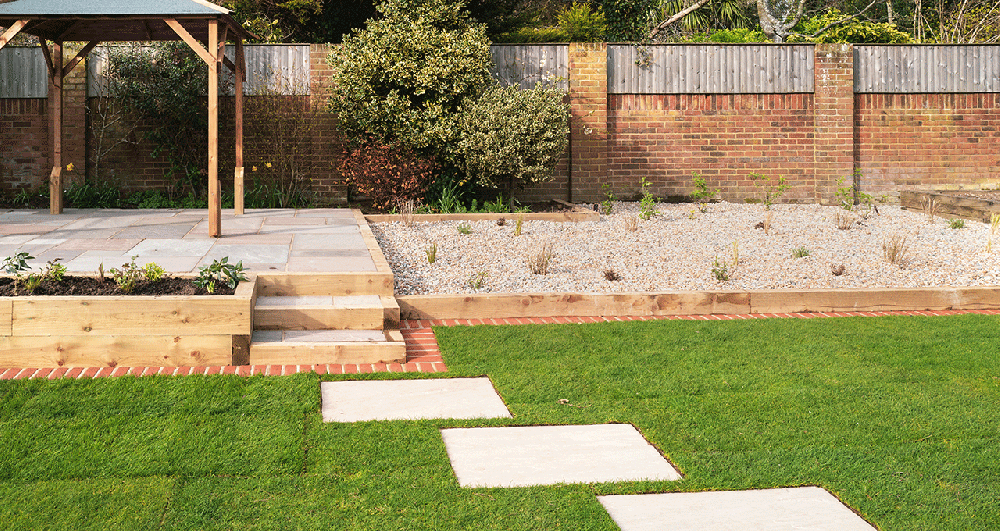
Railway sleepers don’t just make one of the best types of wood for raised beds; they’re an excellent choice for lawn edging too. If you’re going down the garden edging route, here’s some extra advice:
Straight Edges
Remember that railway sleeper edging needs to be as flat as a pancake and as straight as can be, so keep in mind the shape of your garden borders – sleepers are going to be about as useful as a chocolate teapot if you have curved edges!
Consider Drainage And Soil Contact
Even though border sleepers aren’t holding back large volumes of soil like raised beds, they’re still in regular contact with moisture from the ground. To help prolong their lifespan, consider laying a thin layer of gravel or aggregate underneath the edging.
Extra Tips On How To Lay Sleepers For Raised Beds
Some special considerations come into play when it comes to making a raised garden bed with railway sleepers. Here are just a couple:
Accessibility
Make sure pathways up to your raised bed are wide enough to accommodate a wheelbarrow or accessibility needs, such as a wheelchair. The minimum width for walking is 30cm (1ft), but you’ll want at least 45cm (18in) to squeeze a wheelbarrow past.
Corner Brackets
Although using brackets, landscaping screws and other fastenings is optional, using these at the overlapping corners of the planter will produce a firmer structure. For this reason, we recommend investing in extra support for railway sleeper beds as they will undergo a little more strain than garden edging.
FAQs
Do I Need To Treat Railway Sleepers Before Using Them In The Garden?
If your sleepers are already pressure-treated, then they’re ready to go. However, any cut edges or drill holes you make will fare better if they’re treated with a wood preservative to prevent moisture damage. Reclaimed sleepers may also benefit from a surface clean and re-sealing, depending on their condition.
How Long Do Railway Sleepers Last In The Ground?
With proper installation and treatments, sleepers can last anywhere from 15 to 30 years, depending on the wood type, drainage conditions, and exposure. Hardwoods will typically last longer than softwoods, especially when in contact with soil.
What’s The Best Way To Cut Railway Sleepers?
Use a circular saw, chainsaw, or handsaw depending on the thickness and wood type of the sleeper as well as your own experience and preference. Always wear appropriate PPE and cut in a well-ventilated area.
Are Railway Sleepers Safe For Vegetable Gardens?
Generally, yes. However, you should be careful about the treatment history of your product. New, untreated softwood sleepers are best for edible beds. If you’re at all unsure about treatment history – especially with reclaimed sleepers – either choose a different material or be sure to line the interior with a heavy-duty membrane to prevent any contact between the soil and the timber.
Can I Paint Railway Sleepers?
Absolutely – you can paint, stain, or oil sleepers to match your garden aesthetics and protect them from the elements. Just be sure that they’re fully dry and clean before application and use an outdoor wood paint for the best results.
Done And Dusted!
Et voila! Everything you need to know about how to lay railway sleepers in the garden – showing you how simple it is to refresh your home patch. For more landscaping insights, check out our expert blog, or, if you’re raring to go, check out our stunning range of railway sleepers.
 Processing